 English
 русский
 Français
 Español
 Português
 Deutsch
 عربى
 Türk

How do you measure wire gauge: Applications, Selection Criteria, and Practical Guidance
Content
- 1 How Do You Measure Wire Gauge? The Direct Answer
- 2 Why Wire Gauge Measurements Go Wrong So Often
- 3 Tools and Preparation for a Repeatable Reading
- 4 How to Measure Solid Wire Gauge
- 5 How to Measure Stranded Wire Gauge
- 6 Measuring Wire Gauge with Insulation Still On
- 7 How Do You Measure Wire Rope Gauge and Diameter
- 8 Accuracy, Tolerance, and the Errors That Matter
- 9 From Measurement to Ferrule, Thimble, and Press Selection
- 10 Comparing Wire Gauge Measurement Methods
- 11 What B2B Buyers Should Ask a Manufacturer or Supplier
- 12 Recording Measurements and Building a Simple Quality Gate
- 13 Related Technical Guidance from the Manufacturer
- 14 FAQ: How Do You Measure Wire Gauge?
- 14.1 How do you measure wire gauge without a gauge tool?
- 14.2 Do you measure wire gauge with insulation on?
- 14.3 How do you measure stranded wire gauge correctly?
- 14.4 Is wire gauge the same as wire diameter?
- 14.5 How do you measure wire rope diameter?
- 14.6 What is the difference between AWG and square millimetres?
- 14.7 How accurate does a wire gauge measurement need to be?
- 14.8 Can I use a ruler instead of calipers?
- 14.9 How do I choose a ferrule after measuring wire rope?
- 14.10 What should a buyer ask a wire rope press manufacturer or supplier?
- 15 Final Checklist for Accurate Wire Gauge Measurement
How Do You Measure Wire Gauge? The Direct Answer
To answer how do you measure wire gauge, start with the metal, not the plastic: strip a short section of insulation and measure the bare conductor with a caliper or micrometer. For solid wire, read the conductor diameter and compare it with an AWG or metric table. For stranded wire, measure one strand, count the strands, calculate total metal area, and match that area to the gauge table. For wire rope, measure the rope across the crowns and read it as a millimetre diameter, not as an electrical AWG number.
That answer sounds simple, but most bad readings come from measuring the wrong thing. A caliper placed over a cable jacket measures insulation thickness plus conductor, not gauge. A caliper placed across a stranded conductor may catch the peaks of two outer strands and miss the valleys between them. A wire rope that has been compressed by a termination can read smaller than its original diameter. Each of these errors feeds directly into the next decision, whether that decision is choosing a terminal, selecting a ferrule, setting a press, or accepting a shipment.
For a wire rope processing shop, wire gauge measurement is not a classroom exercise. It is the first step in matching a rope to a thimble, a sleeve, a die set, and a hydraulic press tonnage. A measurement that is 0.2 mm off on a small strand can change the calculated area enough to move the wire into a different gauge class. A rope diameter that is read over loose or damaged outer wires can send a sling maker toward the wrong ferrule. The practical rule is to measure clean, sound metal, record the method, and keep the reading traceable.
Why Wire Gauge Measurements Go Wrong So Often
A common scene in a maintenance workshop: a technician pulls a coiled cable from a cabinet, reads 12 AWG on the jacket, then puts calipers across the outside and gets a number that does not match a 12 AWG conductor table. The cable is not wrong. The measurement is wrong because the caliper is sitting on the jacket. Insulation can add 0.5 mm, 1 mm, or much more depending on voltage rating, temperature rating, and cable construction. The gauge number printed on the jacket refers to the conductor, not the finished cable outer diameter.
Stranded wire creates a second layer of confusion. A stranded conductor is not a single round rod. It is a bundle of smaller wires, often arranged in layers. If you close a caliper across the outside of the bundle, you are measuring the bundle envelope, which includes small air gaps between strands. The result can look larger than the true equivalent area. The correct approach is to measure one strand, count how many strands carry current, and calculate the total metal cross-sectional area. That calculated area is what corresponds to the gauge table.
AWG also behaves in the opposite direction from many people's intuition. A higher AWG number means a thinner conductor. A 14 AWG wire is thinner than a 10 AWG wire. In metric sizing, the number usually describes area in square millimetres, so a larger number means more metal. Mixing the two systems without checking the unit is a reliable way to create a purchasing error. The same issue appears with wire rope: a 12 mm rope is not compared with a 12 AWG electrical wire. They are different product families with different measurement conventions.
There is also the condition of the sample. Corroded copper, crushed strands, kinked rope, and dirty surfaces all change the reading. A rope that has been pressed into a sleeve may show a distorted diameter near the termination. A cable that has been bent tightly may have an oval cross-section. Good measurement starts with a sound, straight, clean sample and a tool that has been zeroed.
Tools and Preparation for a Repeatable Reading
You do not need a laboratory to measure wire gauge, but you do need tools that are suitable for the size of the wire and the precision you intend to claim. For small solid conductors and individual strands, a digital caliper with 0.01 mm resolution is a practical starting point. A micrometer is better for repeatability on very small strands because it applies a controlled measuring force and has a clear spindle and anvil. For wire rope above roughly 10 mm, a large caliper or a circumference tape is often more practical than trying to fit a small jaw around the rope.
A basic measurement kit should include:
- A zeroed digital caliper with fresh battery and clean jaws.
- A micrometer for strand diameters below about 1 mm.
- A wire gauge wheel or slotted gauge for quick field checks, used as a screening tool rather than a final record.
- A flexible circumference tape or large caliper for wire rope and thick cable.
- A magnifying lens for strand counting and surface inspection.
- A soft cloth, contact cleaner if permitted, and a straight reference surface.
Preparation matters as much as the instrument. Wipe the conductor or rope surface clean. Straighten the sample without stretching it permanently. Zero the caliper and check it against a known reference, such as a gauge block or a certified pin, if the reading will be used for acceptance. Measure in more than one direction on round products because ovality can distort a single reading. For stranded wire, count the strands with the same care you use for the diameter. A correct strand diameter with a wrong strand count produces a wrong area.
Record the tool identification, the measurement method, and the sample location. If two operators measure the same wire and get different results, the record should show whether they measured different locations, used different tools, or interpreted the gauge table differently. That traceability is useful in production, in incoming inspection, and in customer disputes.
How to Measure Solid Wire Gauge
Solid wire is the simplest case. The conductor is one round metal core, so the diameter directly represents the gauge when the wire is round and undamaged. Use a caliper or micrometer across the bare conductor at three points along the sample, rotating the wire between readings. Take the average if the readings are close. If one reading is far from the others, inspect for a flat spot, a burr, or a bend before accepting the number.
- Strip about 25 mm to 40 mm of insulation without nicking the conductor.
- Clean the bare metal and confirm that the sample is round, not flattened.
- Close the caliper gently on the conductor and record the diameter in millimetres.
- Repeat at two more locations and rotate the wire between readings.
- Compare the average diameter with an AWG table or convert it to metric area.
For example, a solid conductor that measures close to 2.05 mm is in the range of 12 AWG. A conductor near 1.63 mm is close to 14 AWG. These are approximate field comparisons because standard tables list nominal diameters and real wire has manufacturing tolerance. The important point is to compare the bare metal diameter with the correct table, not the outside diameter of the finished cable.
If the wire is not round, the diameter method becomes less reliable. A flattened conductor may read wide in one direction and narrow in the other. In that case, measure both directions and investigate why the wire is deformed. For critical electrical work, replace questionable samples rather than forcing a gauge number from a damaged conductor.
How to Measure Stranded Wire Gauge
Stranded wire requires a two-part measurement: strand diameter and strand count. The outside envelope of a stranded bundle is not the conductor diameter. The correct value is the total metal area of all current-carrying strands. For a simple round strand construction, calculate the area of one strand and multiply by the number of strands. Then compare the total area with the gauge table or convert it to square millimetres.
- Strip the insulation and fan out the strands without breaking them.
- Count the strands carefully. Use magnification if the wire is small.
- Measure the diameter of one representative strand with a micrometer or caliper.
- Calculate one strand area using area equals pi times diameter squared divided by four.
- Multiply by the strand count to get total metal area.
- Convert the total area to AWG or compare it with the appropriate metric size.
Suppose a stranded conductor has 19 strands and each strand measures 0.41 mm. The area of one strand is about 0.132 square millimetres. Multiply by 19 and the total is about 2.51 square millimetres. That value can then be compared with a metric cable table or an AWG equivalent table. If the strand count is wrong, the result is wrong even if the diameter is perfect. This is why counting is not optional.
Construction matters. A compacted stranded conductor is pressed to reduce gaps, so its outside envelope is smaller than a non-compacted conductor of the same area. A bunched conductor may have a different envelope than a concentric-lay conductor. In both cases, the total metal area remains the useful comparison. If the wire is tinned, the coating adds a small amount to the measured diameter, so the reading may not exactly match a bare copper table. For acceptance work, use the applicable product standard and the agreed measurement method.
Do not use the overall bundle diameter to estimate gauge by eye. A bundle can look thick because of air gaps and lay angle while containing less copper than expected. The numerical method is slower, but it gives a defensible result that can be repeated by another inspector.
Measuring Wire Gauge with Insulation Still On
Measuring wire gauge with insulation still on is possible only as a screening check, not as a reliable final measurement. The jacket, bedding layers, shield, and armor all add thickness. Two cables with the same conductor gauge can have very different outside diameters because one is rated for a higher voltage or a harsher environment. If you measure the outside and compare it with a conductor table, you are likely to underestimate the gauge.
The better method is to strip a short sample from a safe location, measure the bare conductor, and then seal or re-insulate the sample if it will remain in service. If stripping is not permitted, use the cable print, the manufacturer's datasheet, or a cross-section photo from a verified sample. An insulation diameter table can help identify a cable family, but it should not be used alone to declare conductor gauge. The risk is especially high in incoming inspection when a supplier's cable is being checked against a purchase specification.
For very fine wire, a non-contact optical comparator or a microscope with a measuring reticle can be useful, but the same principle applies: measure the metal, not the coating. If the wire is enameled, the enamel is insulation. Remove it carefully at the measurement point or use a method that accounts for the enamel thickness. For production control, define whether the reading includes plating, coating, or enamel, and keep that definition consistent across lots.
How Do You Measure Wire Rope Gauge and Diameter
Wire rope is a different product from electrical wire, and the word gauge can mean different things. In rigging and wire rope processing, the important measurement is usually the rope diameter in millimetres. In some contexts, wire gauge refers to the diameter of the individual wires that make up the rope. Both measurements can matter, but they answer different questions. Rope diameter drives ferrule and thimble fit, while individual wire diameter and construction affect flexibility, fatigue performance, and pressing behaviour.
Measuring rope diameter across the crowns
Place the caliper across the rope so that the jaws touch the highest points of the outer strands, often called the crowns. Do not measure across a valley between strands. Take readings at three points spaced along the rope and, where possible, in two directions at each point to check ovality. The rope should be straight and under a light tension similar to its service condition. A slack rope can read large because the strands are not seated; an over-tensioned rope can read small because the diameter is reduced by stretch.
For large rope, a circumference tape is often easier and safer than a giant caliper. Wrap the tape around the rope, read the circumference, and divide by pi to obtain the diameter. Keep the tape square to the rope axis and avoid pulling it so tight that it compresses the outer strands. For rope with a fibre core, independent wire rope core, or compacted outer strands, record the construction because two ropes with the same diameter can have different metallic area and different pressing requirements.
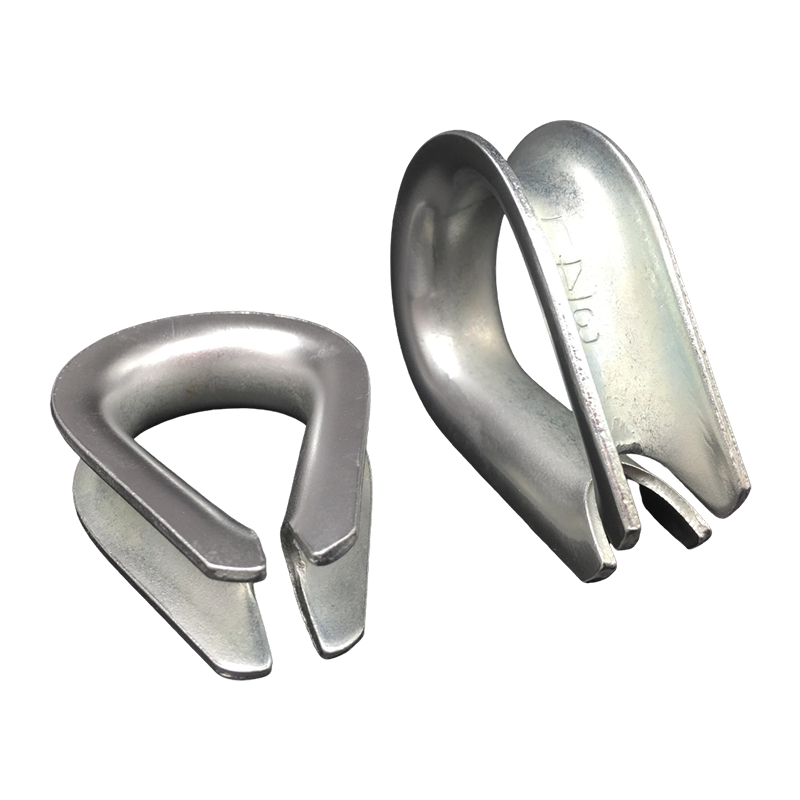
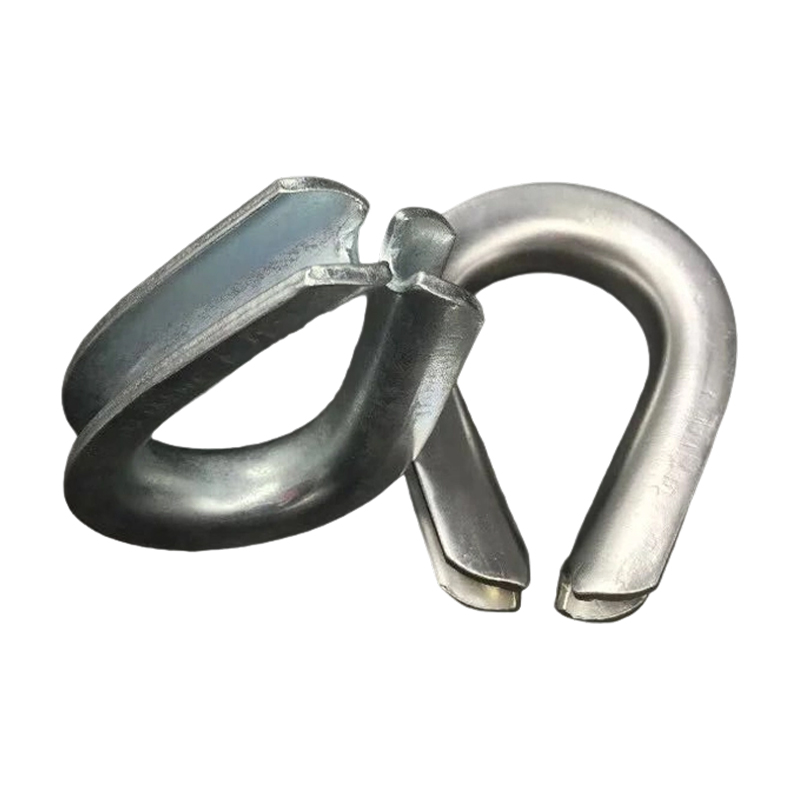 Wire Rope Thimbles for Lifting and Sling AssembliesU-shaped metal fittings protect rope eyes and require groove-to-diameter matching; 3–30 mm sizes support sling assembly selection.View Product →
A thimble is a good example of why the reading must be correct. The thimble groove has to match the rope diameter and termination style. A thimble that is too small may not seat properly; one that is too large can allow the rope to move under load. The rope diameter measured at the sound section, away from the termination, is the starting point for that selection. The same logic applies to ferrules, swage terminals, and thimbles used in sling assemblies.
If the rope is already fitted with a termination, measure the rope body away from the pressed zone. The pressed area is intentionally deformed and will not represent the original rope diameter. If only the terminated end is available, use the printed rope identification, the termination drawing, or a non-destructive method agreed with the supplier. Do not force a caliper onto a pressed sleeve and call that the rope diameter.
Accuracy, Tolerance, and the Errors That Matter
A measurement is only useful if its tolerance is appropriate for the decision. On a 0.5 mm strand, a 0.02 mm caliper error is small. On a 40 mm wire rope, the same 0.02 mm error is negligible. The real risk comes from method errors that are much larger than tool resolution: measuring over insulation, missing a strand count, reading a rope at a valley, or using a caliper with worn jaws. Before arguing about the last 0.01 mm, confirm that the sample and method are right.
For wire rope, the applicable product standard or purchase specification usually defines the nominal diameter, tolerance, and measurement method. For electrical wire, the conductor standard defines nominal area or diameter and permitted variation. In both cases, the inspection record should state the instrument, the number of readings, the sample location, and the acceptance rule. That prevents a later disagreement about whether a reading was taken at the correct place or with the correct tool.
| Measurement scenario | Recommended method | What to record | Typical risk if ignored |
|---|---|---|---|
| Solid single conductor | Caliper or micrometer on bare metal | Diameter, average reading, tool ID | Wrong terminal or circuit rating |
| Stranded conductor | Measure one strand, count strands, calculate area | Strand diameter, strand count, total area | Understated gauge and overheating risk |
| Insulated cable | Strip a short sample; do not use jacket diameter alone | Conductor size, insulation type, sample location | Jacket size mistaken for conductor gauge |
| Wire rope | Caliper across crowns under light tension | Rope diameter, construction, lay, ovality | Wrong ferrule, thimble, or die selection |
| Large wire rope | Circumference tape or large caliper | Circumference, calculated diameter, tape ID | Mismatch with termination hardware |
| Damaged or corroded sample | Clean and measure a sound section; inspect first | Condition, location, accept or reject decision | False reading from crushed or dirty metal |
When a reading falls near a gauge boundary, do not round it toward the more convenient size without a rule. Define how rounding is handled in your inspection plan. If the wire is close to the limit, take more readings and use the average only when the procedure allows it. For safety-related wire rope terminations, the rope diameter, construction, and termination drawing should be reviewed together rather than treated as separate checks.
From Measurement to Ferrule, Thimble, and Press Selection
Once the wire rope diameter and construction are known, the next step is matching the termination. A ferrule or sleeve is not chosen by diameter alone. The rope construction, metallic area, termination efficiency requirement, and press die profile all influence the result. An aluminium hourglass sleeve, a DIN 3093 aluminium ferrule, a Flemish eye steel ferrule, and a swage terminal each have their own dimensional relationships to the rope. The measurement tells you where to start; the termination drawing tells you what to confirm.
Press tonnage should be selected from the die and fitting requirements, not from a guess based on rope diameter. A small rope with a hard construction may need a different die set and pressing strategy than a larger rope with a softer core. The press frame also matters. A C-frame machine can be convenient for certain workshop positions and smaller workpieces, while a basket-frame machine is often preferred for larger tonnage and heavy sling work. The GT series from Jiangsu Xingtai Hydraulic Manufacturing covers models from GT60 through GT2000, so the selection conversation can stay within one equipment family rather than mixing unrelated machine sizes.
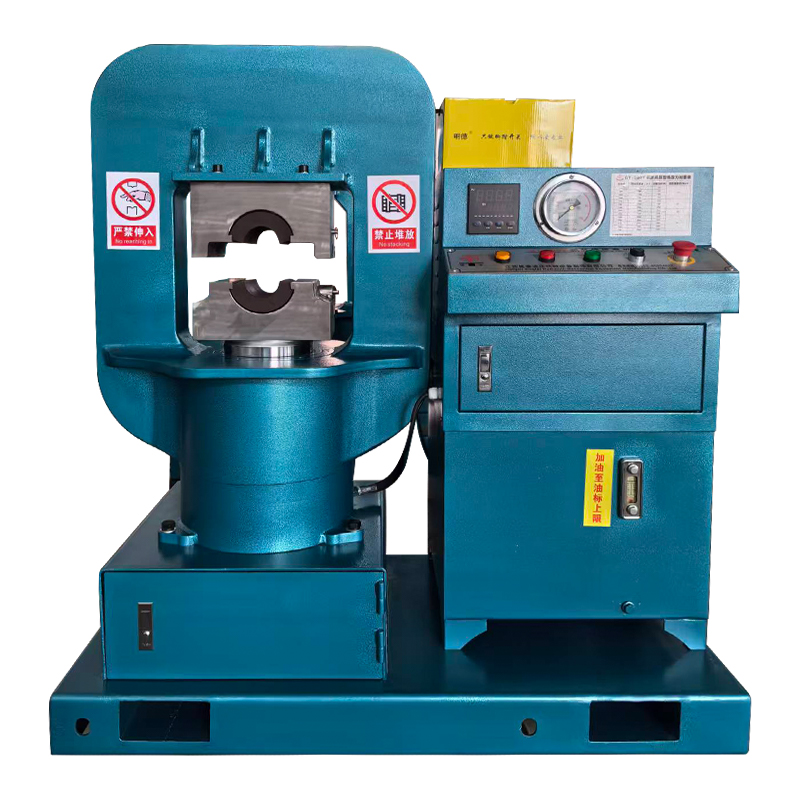 GT-300 Basket-Frame Press for Wire Rope SlingsBasket-frame machine presses 6–30 mm wire rope, with CE certification, automatic control, foot switch, and dimensions for sling workshop planning.View Product →
For a sling shop, the practical workflow is to measure the rope, confirm the termination drawing, select the ferrule or sleeve, select the die, set the press, and verify the first article. The first article check should include the pressed dimensions, visual condition, and any pull test required by the specification. If the rope diameter is at the upper limit, the die clearance and sleeve fit should be checked before full production. If the rope is at the lower limit, the same check applies in the other direction. A press that is set correctly for one lot may need adjustment for the next lot if the rope diameter or construction changes.
Buyers comparing a wire rope press manufacturer, supplier, or wholesaler should ask for the die chart, recommended tonnage range, consumable compatibility, and spare-parts list. A machine that can press a sleeve is not automatically a good match for every sling design. The supplier should be able to explain how the measured rope diameter translates into a die and sleeve recommendation, and what first-article checks are expected.
Comparing Wire Gauge Measurement Methods
The chart below is a practical comparison, not a published standard. It scores common methods by repeatability when a trained operator uses clean, identified samples and records the result.
The scores are illustrative and assume that the correct method is matched to the product type. A high score does not mean the method is right for every wire or rope.
For a press operator, the reliable inputs are the bare strand diameter, the rope diameter, and the rope construction. Those inputs feed die selection, sleeve fit, and press tonnage. A visual comparison may be fast enough to sort scrap from good stock, but it is not strong enough to release a production lot. A caliper over insulation may be useful for identifying a cable family, but it should not be used to confirm conductor gauge.
The chart also shows why two measurements are often better than one. Strand diameter without strand count is incomplete. Rope diameter without construction is incomplete. A press setting without a first-article check is incomplete. The goal is not to collect numbers; it is to create a chain of evidence that supports the termination decision. When the chain is complete, a supplier and a customer can review the same record and reach the same conclusion.
For wire rope equipment, the most useful measurement record is usually a short combination: nominal rope diameter, measured diameter, construction, lay, ferrule or sleeve reference, die reference, press model, and operator. That record can be compared across lots and used to investigate a dimensional drift before it becomes a rejected sling.
What B2B Buyers Should Ask a Manufacturer or Supplier
When wire gauge or wire rope diameter affects a purchased component, the buyer should ask how the supplier defines and checks the dimension. A general catalogue image is not enough. The conversation should cover the nominal size, tolerance, measurement method, and the point in the process where the check is made. This is especially important when the buyer is sourcing presses, dies, ferrules, thimbles, or complete sling assemblies from an overseas manufacturer.
Useful questions include:
- Which standard or drawing defines the nominal wire or rope size?
- Is the inspection made on bare metal, on the finished rope, or on the pressed assembly?
- What instrument is used, and how is it calibrated?
- How many readings are taken, and at what locations?
- How is strand count verified for stranded conductor or rope construction?
- What tolerance applies to the ferrule, thimble, or die in relation to the measured rope?
- Can the supplier provide a first-article report or sample press record?
- What spare parts, die charts, and operator training are available after delivery?
A manufacturer with in-house machining and assembly can often explain how the press frame, hydraulic system, and die interface work together. A supplier or wholesaler may carry the same equipment but should still be able to provide the technical data and support path. The buyer should not accept a vague statement that the machine is suitable for all rope sizes. Press tonnage, die size, and frame type create practical limits that should be stated clearly.
For international purchases, ask for the measurement units used in the drawings and the inspection report. A drawing in millimetres and a purchase order in inches is a recipe for confusion. Confirm whether the quoted diameter is nominal, minimum, or average, and confirm how ovality or tolerance is handled. If the product is a sling assembly, ask for the termination efficiency requirement and the test method, not only the rope diameter.
Recording Measurements and Building a Simple Quality Gate
A simple quality gate prevents a small measurement error from spreading through the production line. The gate can be a paper form, a spreadsheet, or a shop-floor system, but it should capture the same core fields: product description, nominal size, measured size, instrument, operator, date, sample location, and accept or reject decision. For wire rope, add construction, lay, and termination reference. For electrical wire, add conductor material and strand count.
The gate should also define what happens when a reading is out of tolerance. Does the lot go to re-inspection, rework, or rejection? Who is authorised to approve a deviation? Is a second measurement required before a decision? These rules turn a measurement into a controlled action rather than a number written on a scrap of paper. In a busy workshop, the most common failure is not a lack of calipers; it is a lack of a clear accept or reject rule.
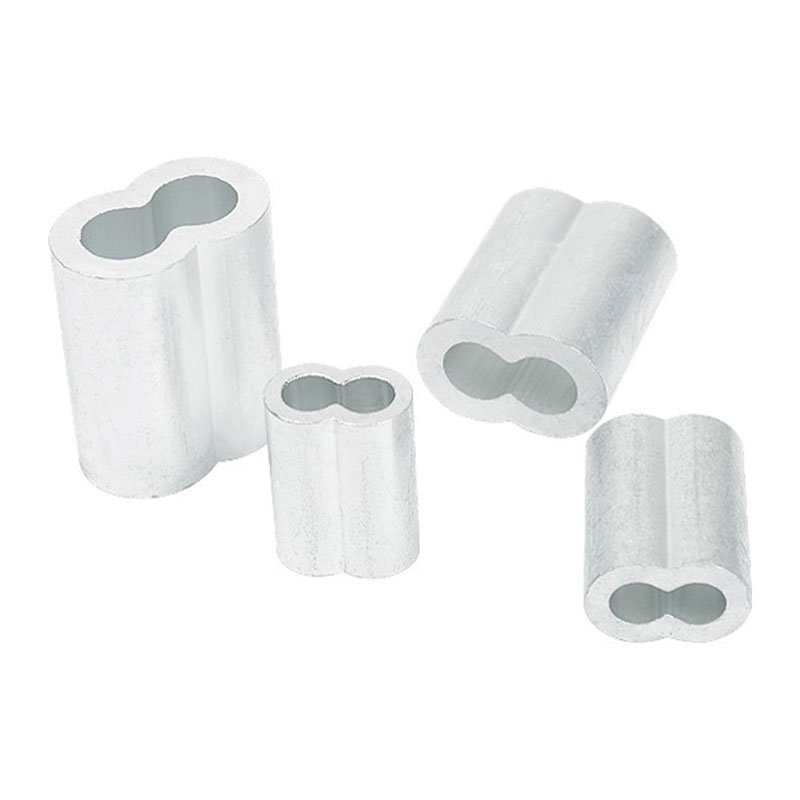 Aluminium Hourglass Sleeves for Swaged Wire Rope TerminationsXTH series covers 1.6–11.1 mm rope diameters for permanent crimped terminations; single-use sleeves suit railings, marine rigging, and slings.View Product →
Consumables deserve the same attention as the rope. An aluminium hourglass sleeve, a DIN 3093 ferrule, or a steel ferrule has a defined fit with the rope and the die. If the rope diameter shifts within its tolerance, the sleeve fit and pressed dimensions can shift as well. Checking the first article and recording the sleeve lot helps separate a rope variation from a consumable variation. It also gives the press operator a baseline for the next production run.
Keep the measurement record with the production lot, not in a separate file that cannot be traced. If a customer asks how a sling was made, the record should show the rope size, the fitting, the press model, the die, and the inspection result. That level of traceability is practical even in a small shop. It supports repeat orders, complaint investigation, and continuous improvement.
Related Technical Guidance from the Manufacturer
Measurement is the first step, but the equipment decision comes next. These technical notes from the manufacturer cover press selection and maintenance topics that are useful after the wire or rope size has been confirmed.
Use these notes as a starting point for a technical conversation, not as a substitute for the termination drawing or the applicable standard. The correct press, die, and consumable combination depends on the measured rope, the fitting, and the required termination performance.
FAQ: How Do You Measure Wire Gauge?
How do you measure wire gauge without a gauge tool?
You can use a caliper, micrometer, or precision ruler for a rough check, but a ruler is not reliable for small wire. For solid wire, measure the bare conductor diameter and compare it with a table. For stranded wire, measure one strand, count the strands, and calculate total area. A gauge wheel is convenient for quick sorting, but it should be confirmed with a caliper when the result matters.
Do you measure wire gauge with insulation on?
No, not for a final gauge reading. Insulation adds thickness and can make a thin conductor appear larger. Strip a short sample, measure the bare metal, and protect or replace the sample afterward. If stripping is impossible, use the cable print or verified manufacturer data rather than relying on jacket diameter alone.
How do you measure stranded wire gauge correctly?
Measure the diameter of one strand, count all strands, calculate the area of one strand, and multiply by the strand count. Compare the total metal area with the gauge table. The outside envelope of the bundle is not the same as the conductor area because it includes gaps between strands.
Is wire gauge the same as wire diameter?
For solid round wire, gauge corresponds closely to diameter, but the gauge number is a standard classification, not a direct diameter unit. For stranded wire, gauge corresponds to total metal area, not the outside diameter of the bundle. For wire rope, gauge may refer to rope diameter or individual wire diameter depending on the context, so the term should be defined.
How do you measure wire rope diameter?
Place a caliper across the crowns of the outer strands, not across the valleys. Take readings at several points along a straight, lightly tensioned rope. For large rope, use a circumference tape and divide the circumference by pi. Keep the pressed termination zone out of the reading.
What is the difference between AWG and square millimetres?
AWG is a gauge number system in which a higher number usually means a thinner conductor. Square millimetres describe conductor area directly, so a larger number means more metal. Use the correct conversion table and do not mix the two units in a purchase specification.
How accurate does a wire gauge measurement need to be?
The required accuracy depends on the product and the decision. Small strands need finer resolution than large rope. The method error is usually more important than the last 0.01 mm. Define the instrument, sample location, number of readings, and acceptance rule before inspecting the lot.
Can I use a ruler instead of calipers?
A ruler can separate obviously different sizes, but it is not suitable for acceptance records on small wire. Calipers and micrometers provide better resolution and repeatability. For wire rope, a ruler can give a rough diameter check, but a caliper or circumference tape is preferred.
How do I choose a ferrule after measuring wire rope?
Use the measured rope diameter, construction, and termination drawing to select the ferrule or sleeve family. Then confirm the die, press tonnage, and first-article pressed dimensions. Do not choose a ferrule by rope diameter alone if the construction or termination efficiency requirement is different.
What should a buyer ask a wire rope press manufacturer or supplier?
Ask for the nominal size, tolerance, measurement method, die chart, recommended tonnage range, calibration practice, first-article report, spare-parts list, and operator training. A supplier or wholesaler should be able to provide the same technical support path as the manufacturer.
Final Checklist for Accurate Wire Gauge Measurement
Use this checklist when a measurement will influence a purchase, a termination, or a production release.
- Identify the product type: solid conductor, stranded conductor, insulated cable, or wire rope.
- Confirm the nominal size and the unit system in the drawing or purchase order.
- Clean the sample and choose a sound measurement location away from damage or pressed zones.
- Zero the caliper or micrometer and check it against a known reference when required.
- Measure the bare metal for electrical wire; measure across the crowns for wire rope.
- For stranded wire, count the strands and calculate total metal area.
- Take multiple readings and check for ovality or variation along the sample.
- Record the instrument, operator, sample location, method, and result.
- Compare the result with the correct AWG, metric, or rope diameter table.
- Link the measurement to the ferrule, thimble, die, press, and first-article check.
When the measurement is part of a customer specification, keep the record with the lot. When it is part of incoming inspection, define the accept or reject action before the first reading. When it is part of press setup, confirm the first article instead of assuming that a nominal rope size will behave the same in every lot.
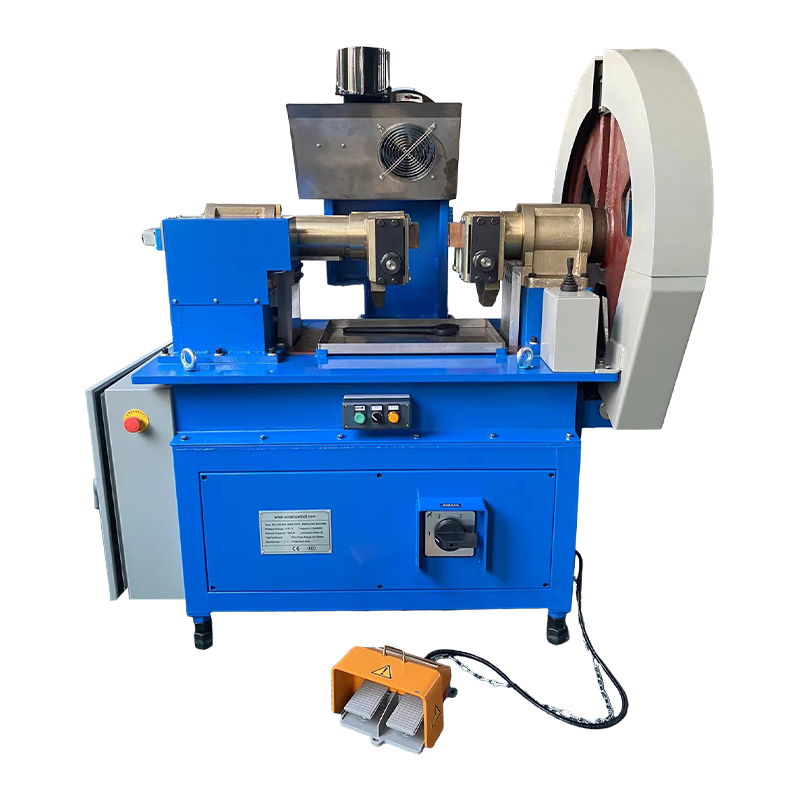

If you require custom hydraulic equipment or technical consultation, please feel free to contact the Xingtai Sales and Engineering Team.
-
 +86-523-86934677
+86-15896002505 -
 [email protected]
-
 +86-15896002505
-
 No. 3 Longgang Road, Gaogang Port Street, Taizhou City, China.
Copyright © Jiangsu Xingtai Hydraulic Manufacturing Co., Ltd. All Rights Reserved. Custom hydraulic machinery manufacturers Wholesale wire rope swagers Factory

